

Exploring EVO Max Series' New Features
Drone Blogs
2023-08-23

Our latest updates bring highly anticipated features to both our EVO Max Series drones and the Autel Enterprise app.
We are in the process of releasing a series of firmware updates for the EVO Max Series drones, accompanied by an update for the Enterprise app.
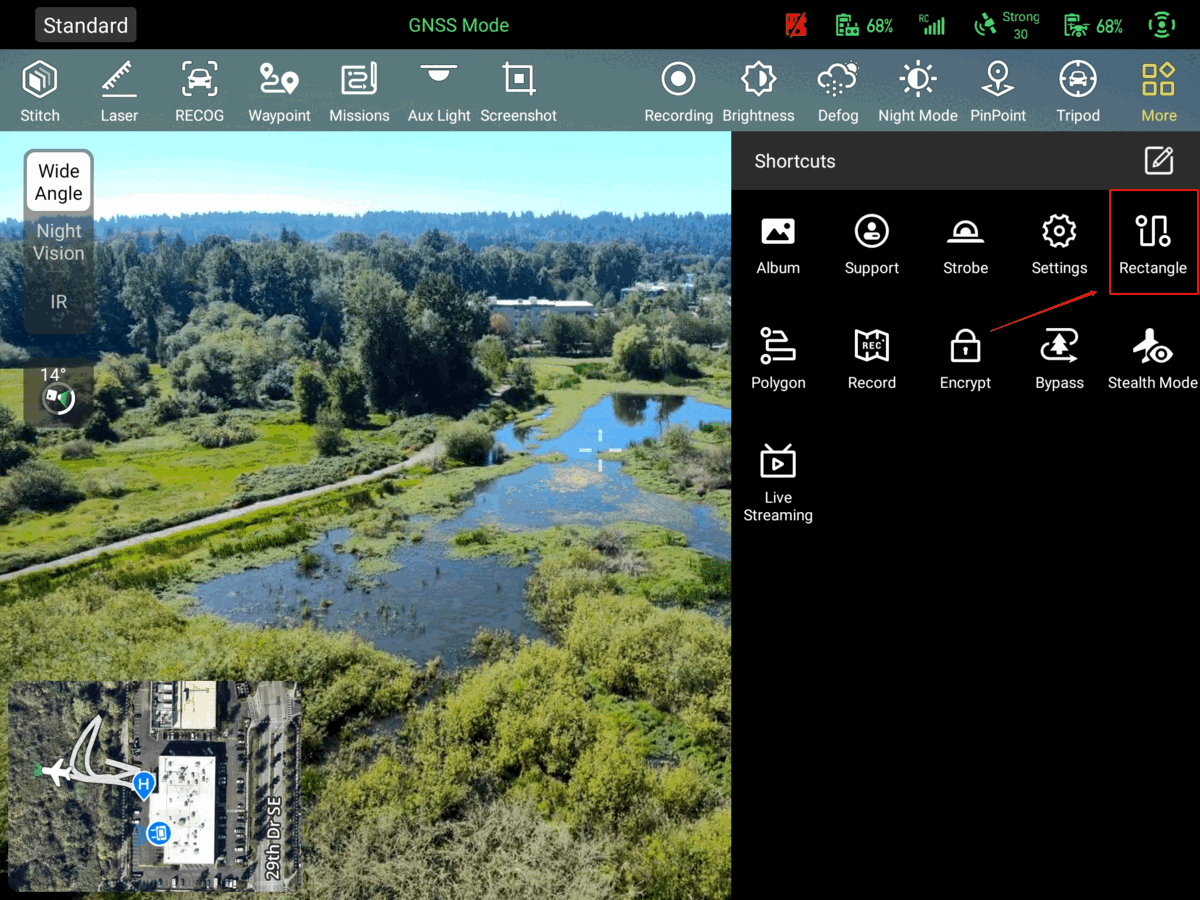
1. Rectangle Mission
Rectangle Mission is an automated flight path that follows a rectangular pattern, useful for missions like photography, mapping, and inspections within a defined area.
Procedure
1. Click Rectangle in the toolbox. This will direct you to the rectangle mission page.
2. Click anywhere on the map to create and adjust the rectangular mission area.
3. Adjust the mission settings located on the right side of the screen.
4. Click the takeoff icon on the middle left of the screen. This action will lead you to a pre-flight check.
5. Thoroughly review the pre-flight check settings, and then slide to initiate takeoff and execute the mission.
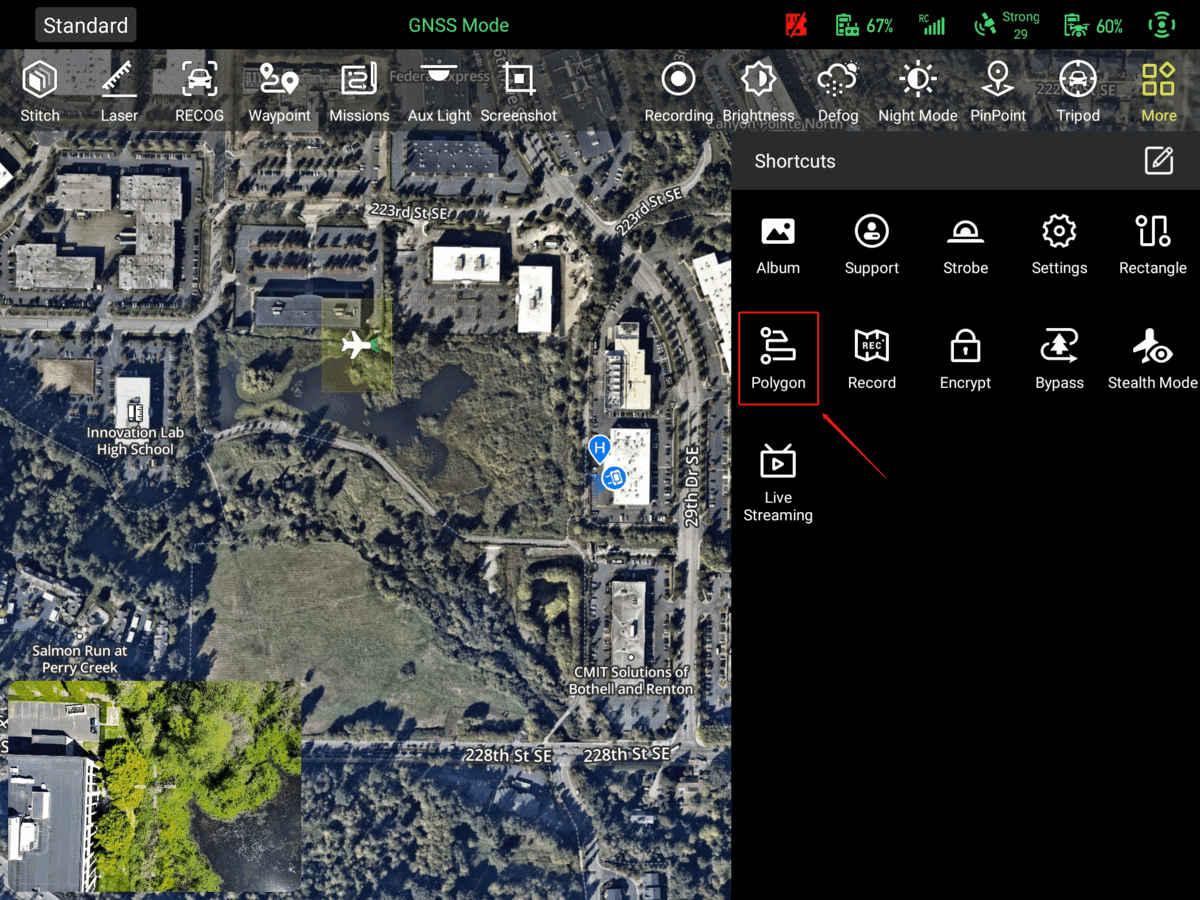
2. Polygon Mission
Polygon Mission is an automated flight path that follows a polygonal pattern, suitable for missions such as photography, mapping, and inspections within a defined area.
Procedure
1. Click Polygon in the toolbox. This will direct you to the polygon mission page.
2. Click anywhere on the map to create and adjust the polygon mission area.
3. Adjust the mission settings located on the right side of the screen.
4. Click the takeoff icon on the middle left of the screen. This action will lead youto a pre-flight check.
5. Thoroughly review the pre-flight check settings, and then slide to initiate takeoffand execute the mission.
3. 50 MP Photo

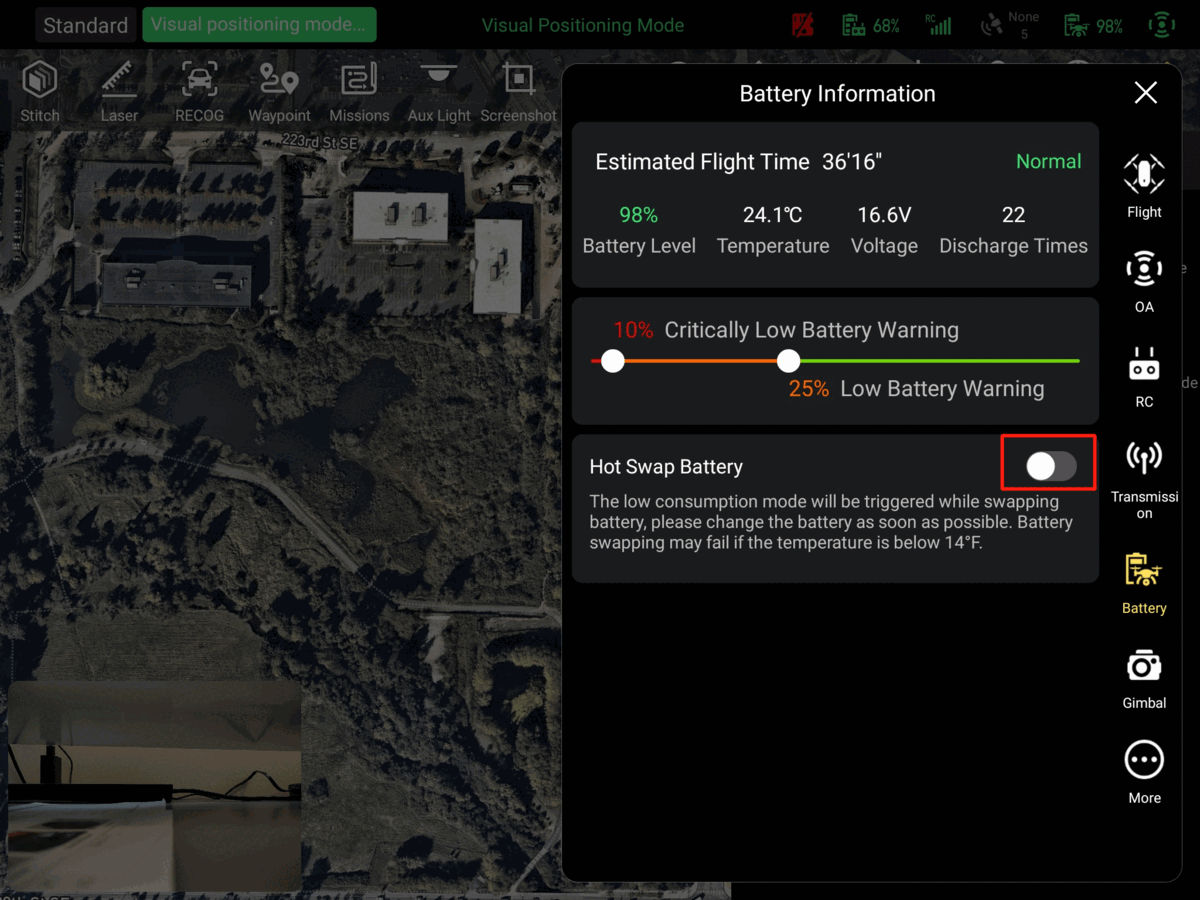
4. Hot-Swappable Battery (Blog)
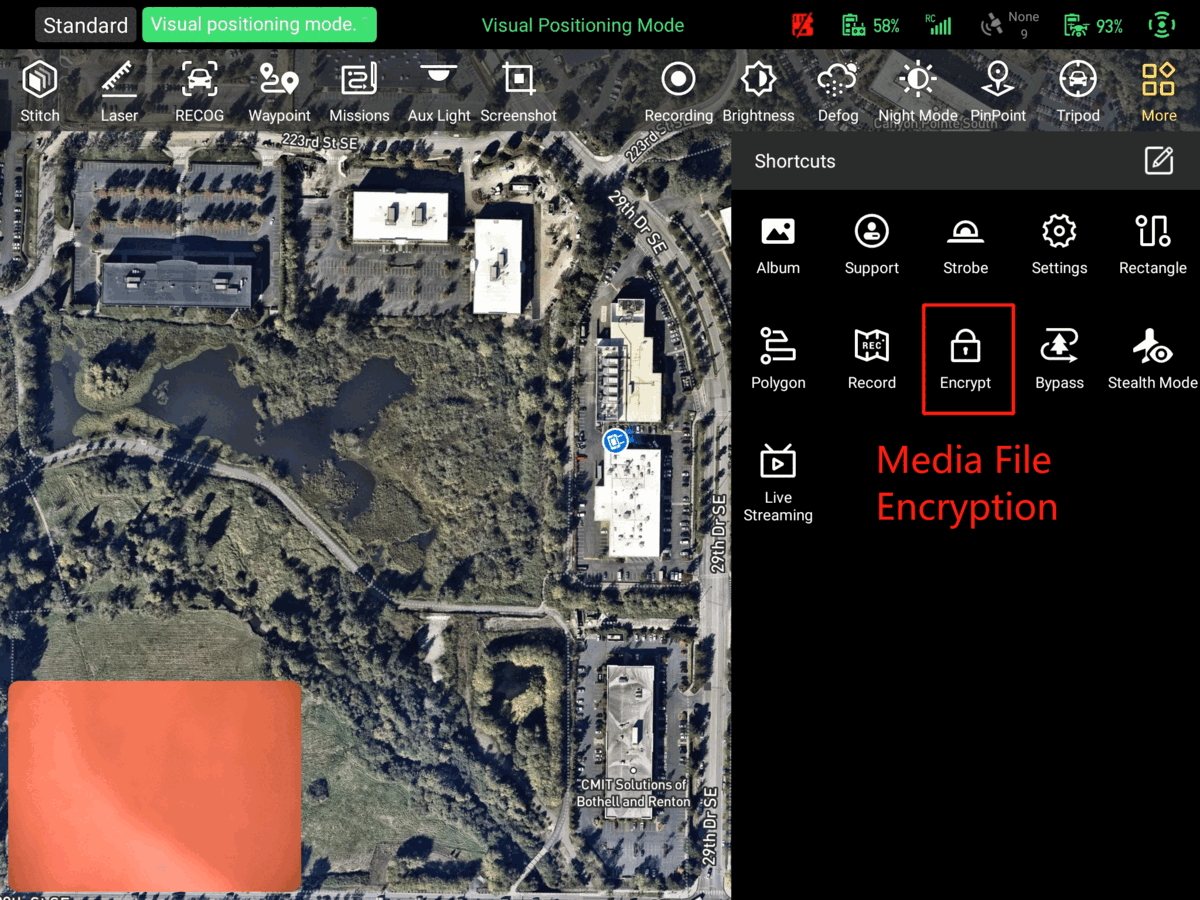
5. Media Encryption
Media encryption safeguards digital media (like photos or videos) through conversion into an unreadable form, ensuring privacy and security.
Procedure
1. Click Encrypt in the toolbox. This will direct you to the media encryption page.
2. Set a password for media encryption, and any photos or videos captured will be encrypted.
3. To view the encrypted files, return to the media encryption page and disable Media Encryption.
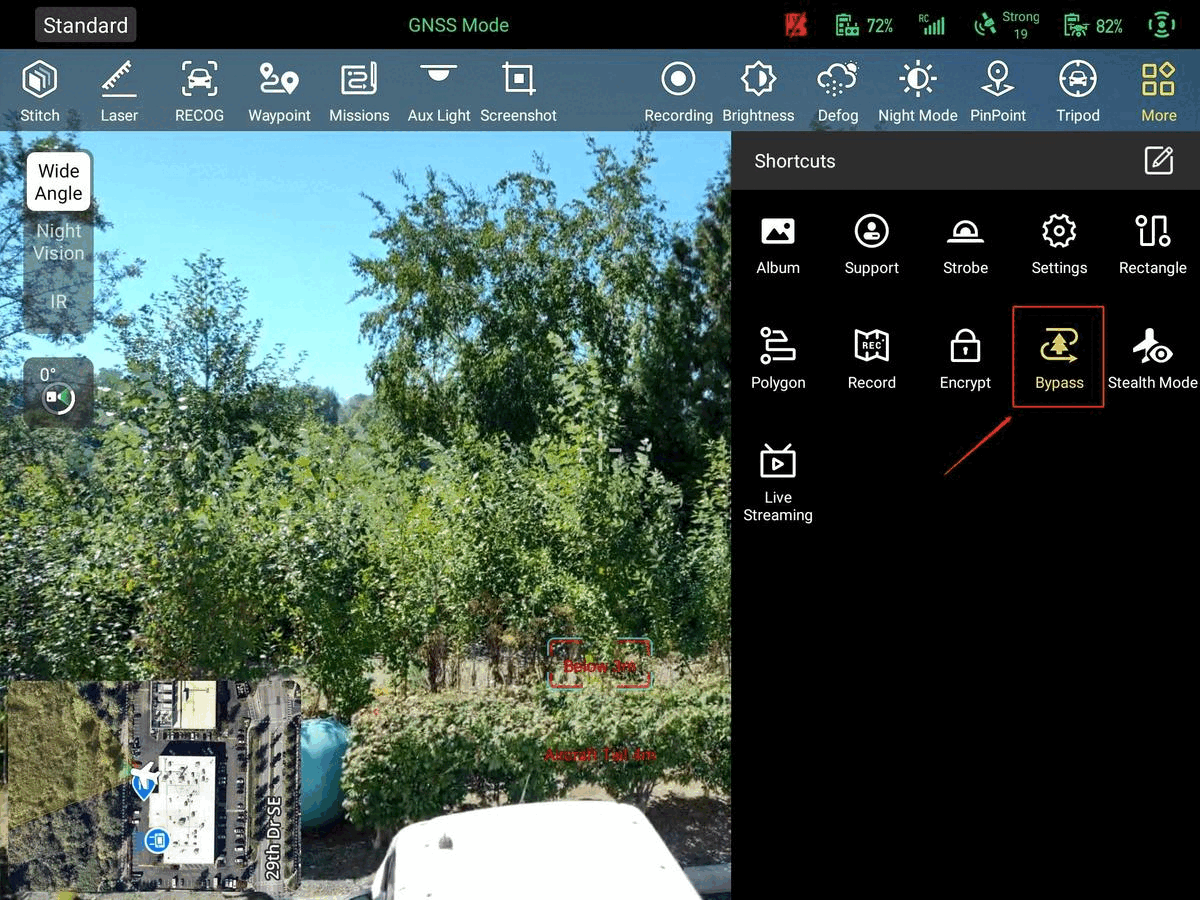
6. Bypassing
This feature enables the drone to autonomously navigate around obstacles while maintaining its intended flight path.
Procedure
1. Click Bypass in the toolbox.
2. The drone will maneuver around the obstacle and continue its flight path.
7. RTMP Live Streaming
RTMP Live Streaming allows you to conduct live streaming on various third-party platforms such as YouTube, Facebook, and more.
Procedure
1. Click Live-RC in the toolbox. This will direct you to the RC live streaming page .
2. Enter a stream title.
3. Enter a stream URL.
Example (YouTube): Stream URL + /Stream Key (rtmp://a.rtmp.youtube.com/live2/xxxx-xxxx-xxxx-xxxx-xxxx)
4. Tap Start to start the live stream, and Live Streaming will be displayed on screen.

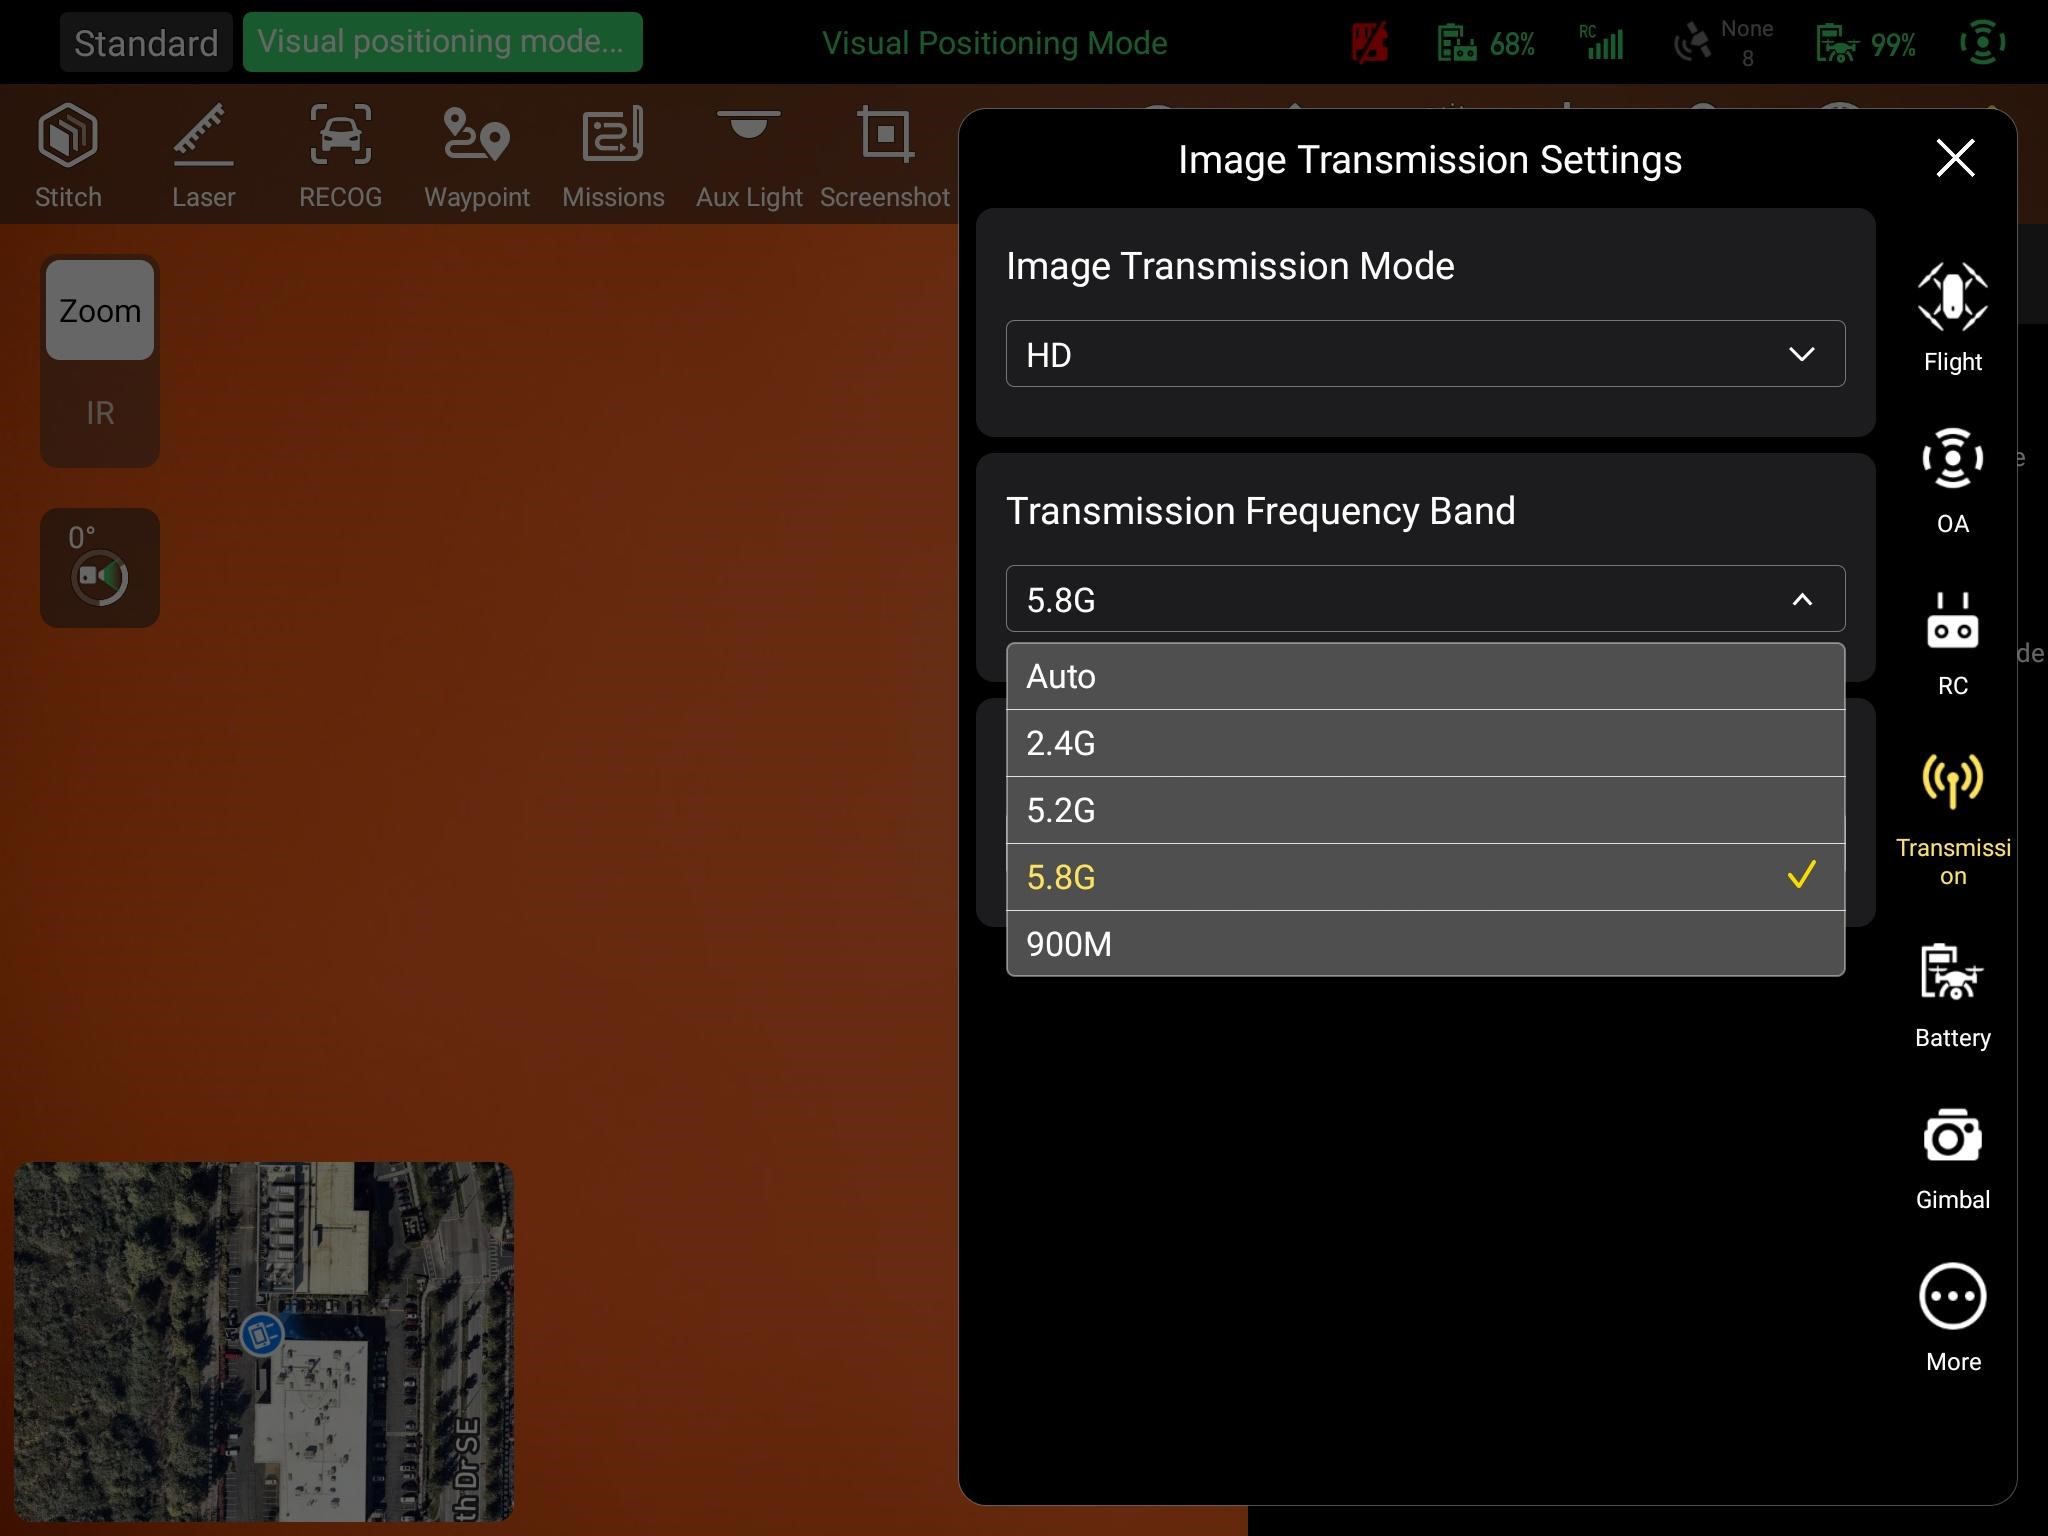
8. Image Transmission Frequency Band Settings
9. Autel Stitch 2.5D
During flight, the RC streams real-time images to Autel Mapper to generate high-precision 2.5D orthophoto images in real time.
Procedure
1. Click Stitch in the toolbar.
2. Go to Server, and then click Add to create a connection with Autel Mapper on your PC. Make sure your RC and PC are on the same network.
a. Enter the name and the network IP address and click Add.
b. When the status changes to Connected, the RC and PC are successfully connected.
3. Finally, launch Autel Mapper on your PC and plan a mission on your RC. As soon as the mission begins, you will see real-time 2.5D stitching on Autel Mapper.

10. Flight Log Auto-Sync (Airdata & DroneLogbook)
The auto-sync feature allows you to synchronize your flight record directly, without the need to sync through the Autel Cloud.
Procedure
1. Click Support in the toolbox. This will direct you to the personal center.
2. Click Log Management on the left window.
3. Click the sync icon located in the top right corner. This will take you to the auto-sync page.
4. Log in to Airdata or DroneLogbook to enable the auto-sync feature.
a. For Airdata, enter your TOKEN, which you can obtain from the Airdata website.
b. For DroneLogbook, use the same email and password associated with your dronelogbook account.

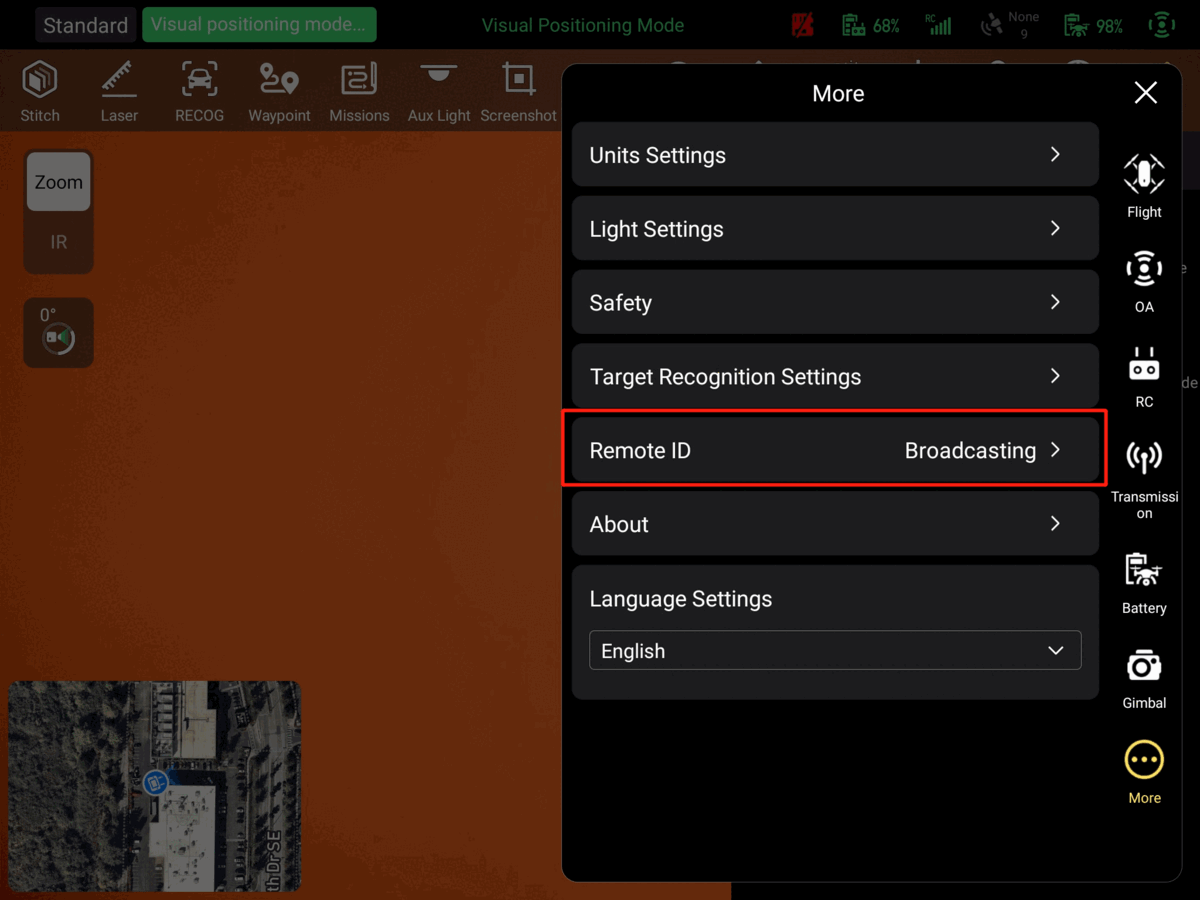
10. Remote ID
Remote ID is the ability of a drone in flight to provide identification and location information that can be received by other parties through a broadcast signal. (The deadline for operational compliance is September 16, 2023. For more information, visit the FAA Remote ID website.)
Notes
1. When you see Broadcasting in the Remote ID section, the Remote ID functionality is enabled.
2. When registering your drone with the FAA, the Aircraft ID on the Remote ID page is your Remote ID SN.
Article by Autel Robotics all rights reserved.